


Step 1: Open Your Frames

Once you have your character’s frames drawn, open all of your animation frames in Photoshop. They will most likely all be in separate windows if they’re separate files. This specific animation consists of 8 frames but yours can be as simple or complex as you’d like as long as the filesize remains under 200kb.
Step 2: Arrange The Frames
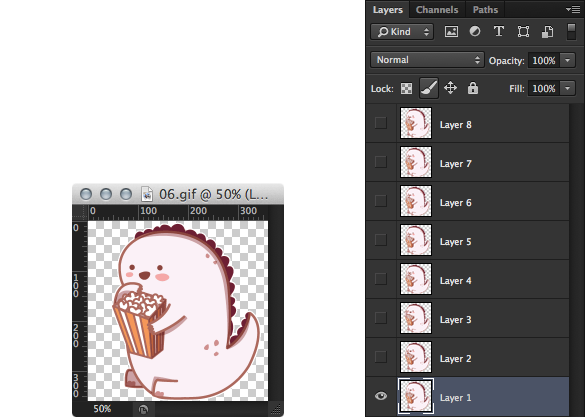
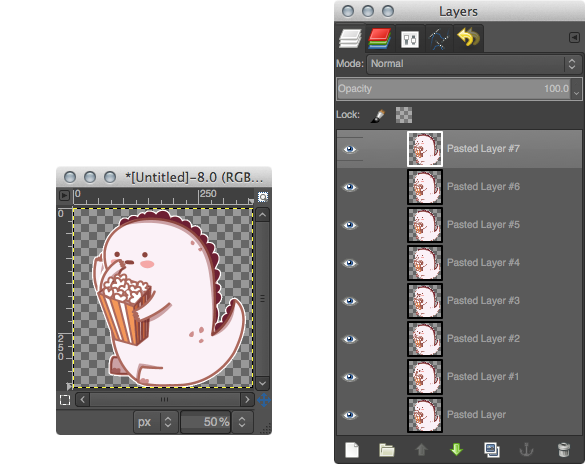
Now, we’ll place all of the individual frames into the same 360x360px image. Your layer palette should look something kinda like our layer palette to the right, and your image should look somewhat like the window below.
Step 3: Set Up The Animation
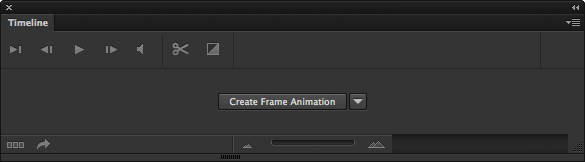
Once you have all the frames in the same document, open up the Timeline. You can find it in the “Window” menu under “Timeline”. You will want to click “Create Frame Animation”. Once you’ve done that, you should see the first frame of your animation show up in the timeline.
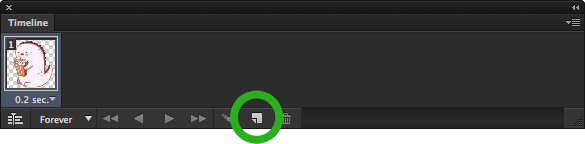
Now that you’ve started your animation, adding the rest of the frames is ultra easy with the New Frame button — the frames will only show visible layers, and each frame can have different layers visible. Let’s take a look at our layer palette...
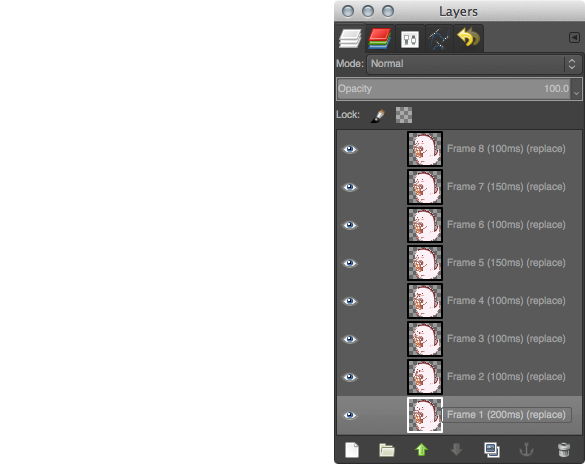
So, as you can see here, we have 8 layers, one for each frame. As we progress through the frames, we can turn on only the layer we want to see (or multiple layers for special effects). In the image to the right, you can see that layer 1 is the only one on. Above, you can see in the timeline, the first frame is also layer 1. Let’s add the rest of the frames with the New Frame button...
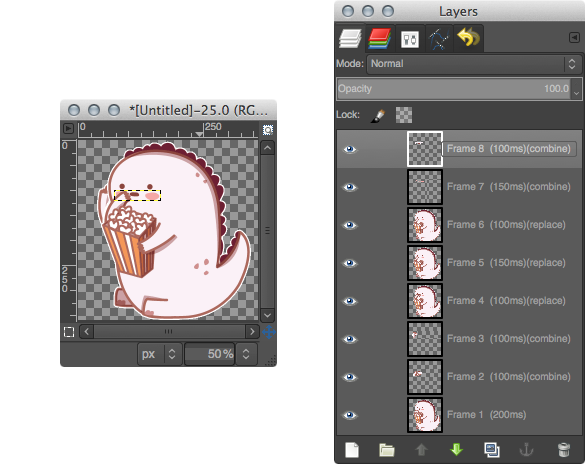
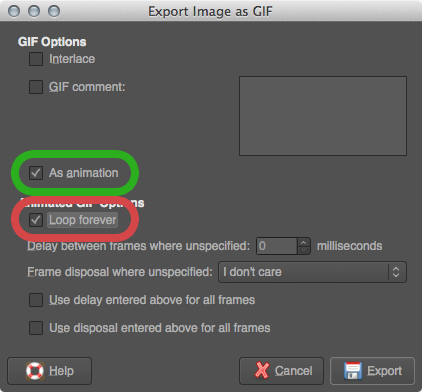
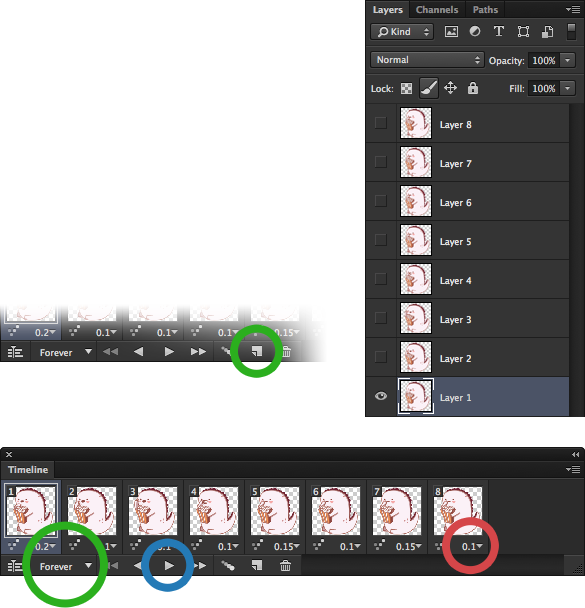
Once you get all of your frames set up in the Timeline, you’ll be able to set how long each frame appears for and how many times the animation should loop. You can find the Loop Control near the bottom left corner of the Timeline window. Set it to “Forever” if it isn’t already. If you’d like to change how long each frame shows for, you can set that by opening the Frame Length dropdown at the bottom of each frame in the Timeline window. Using the Play button on the Timeline window, let’s preview our animation...
Step 4: Export The Animation
Once you’re satisfied with your animation, you’ll want to export it as a .GIF. For that, we’ll need the Save for Web window. It can be found in the “File” menu under “Save for Web...”.
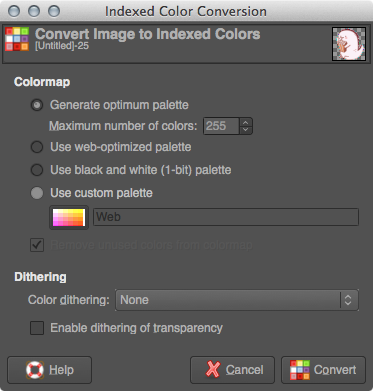
In this window, you’ve got options to increase or decrease the color set and change how colors are displayed in addition to whether the file has any transparency — all of these controls can be utilized to change the filesize and as a result, can also change the appearance of your work.
Make sure your animation is 200K or below by referencing the filesize readout in the bottom left of the preview pane. It will update as you change options to help you optimize your animation if needed.
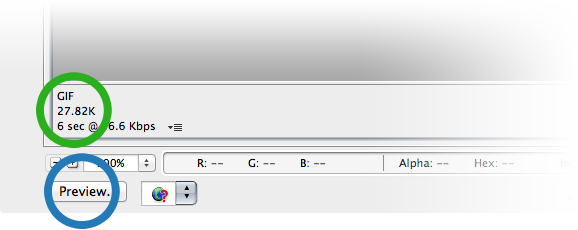
Along with the settings for your color options, you’ve also got the ability to preview the animation in a browser. Once you’ve got your colors all set and the filesize is below 200K, hit the Preview button in the bottom left corner. This will open the animation in your default browser so you can see it running at actual speed — this may sound weird, but sometimes the animation doesn’t run at full speed in Photoshop, so previewing it is important.
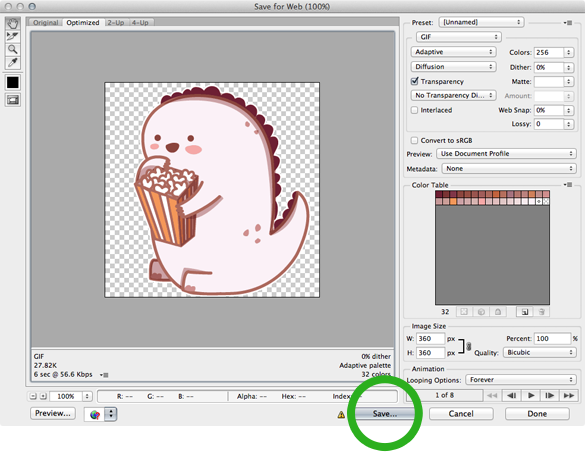
At this point, if everything is to your liking, you can hit the Save button on the Save For Web window and that’ll open up your OS save dialogue where you can name your file — you’re all done!